

Stargazer 101: How to Capture the Starry Night Sky
In October of 2021 I had the opportunity to travel to Iceland. It was an incredible trip and we were lucky enough to be visiting at a peak time for viewing the Aurora Borealis. While I had done research on the best ways to capture the northern lights with a camera, I was absolutely not prepared for the adventure ahead of us involved with viewing this spectacular natural event.
During our overnight flight we were actually able to view the swirling Aurora outside the window of the plane. It was incredible to see at that elevation, since no other lights were getting in the way. After flying through the night, arriving at 6:00am to start a full day of activities, and watching the northern lights tracker all day, we were (sleepily) ready to find the best place to view the lights.
If you have seen the Aurora Borealis before, you might know that viewing it with your naked eye and viewing it through a digital camera are often two completely different experiences. The most vibrant colors appear once you have snapped a photograph and can look at what the camera has picked up. So finding the best place to see the lights is not as easy as looking up into the sky!

We drove all around Reykjavík during the late night hours, visiting spots that were recommended as having limited light pollution. We joined hundreds of other people at a lighthouse out on the tip of the island, watching the stars gradually get covered by what looked like a swirling, grayish-green cloud. We could see the lights of the city below, and see the lights come to life in the sky. We drove to a new spot at the top of a large hill outside the city, with no lights or buildings around save for a tiny wooden shack. As we looked into the sky, we could see more of the swirling clouds - but after setting up the tripod and letting the camera do its thing, we realized the entire sky was filled with greens and pinks. It was amazing to experience and I hope to be able to travel back one day to chase the northern lights again.
After arriving back in Boston I knew right away that I wanted to translate this incredible experience into a piece of art, but I also knew that that challenge would be an adventure of its own. In order to bring the Aurora Borealis to life in clay, I made a few observations about the most important characteristics of the real phenomenon. Of course these details are not always the same across every instance of the northern lights, but in general my observations included:
- a distinct, defined lower edge
- a gradual gradient as you look higher in the sky
- a gently undulating wave pattern along the edges
- hues of green and pink and blue
- stars visible in the sky "behind" the northern lights
- a color transformation when viewed with the naked eye vs. a camera lens

Once I had an idea of what aspects of the Aurora I needed to include, I could start prototyping and testing ideas. Developing a new design takes a lot of trial and error, which is where the magic happens! That trial and error can take even more time when you are trying to capture something found in nature and bring it to life with a completely different material. The first few did not turn out well - whether they were too opaque against the night sky, or the lines were too clean, or the colors weren't blended together - but each trial brought me closer and closer to a final idea. And once that final idea was ready, I got started making!

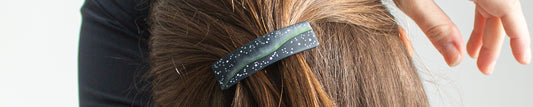
The Aurora design can be found in a variety of styles - as dangle earrings, a barrette, a necklace, and a tie clip. The same beautiful colors and patterns exist in their own unique way on each type of accessory, as part of a cohesive collection but with distinct attributes.
Read more below to see how we create the Aurora Barrette, start to finish!

Each design begins with a custom-mixed color - for the Aurora designs, that color is Midnight. A blend of black clay, ultramarine clay, and a bright yellow clay, this gorgeous color is just dark enough to seem like the night sky, but just light enough to differentiate from black. Once the color is mixed, it gets rolled to the correct thickness through a pasta machine! This machine can be adjusted to different thicknesses and produces a flat slab of clay. After that, the initial rectangular shape is cut.

The next steps are when the design starts to develop. A thin layer of clay is added on top of the base clay, creating the undulating bottom edge for the Aurora, which comes in a later step. This layer of clay helped address the problem faced during the prototyping stage, in which I wanted to capture the distinct line of the Aurora on one side, but also capture the flowing, blurring edge on the other side. During this step I also make tiny little dots all over the Midnight blue clay, as well as shape the barrette for baking.

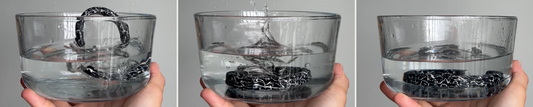
Once the clay is baked for the first time, the stars can come to life! I add white clay into the dots I made previously, then remove the excess clay from the top. The white remains in the indents but not on the surface, similar to adding grout to the spaces in between tiles. It's a unique way to create tiny details without using paint!

One of the best parts of the Aurora design is that each is completely unique - from the curves of the bottom edge to the shading of the gradient! Because it is made by hand without many specific tools, the Aurora is naturally brought to life. Additionally, the clay colors of the Aurora actually change color once they are baked to a darker hue, an effect that makes them more subtle and more realistic.
Thanks for joining me on an adventure into the starry sky! Leave a comment below if you'd like to read more about the making of designs like the Aurora barrette.

No comments